Homemade Coconut Fudge Recipe
What if you could satisfy your sweet tooth with a light, fluffy fudge that requires just 10 minutes of active prep and delivers the perfect marriage of bright strawberry and toasted coconut—without the heavy stirring or candy thermometer required by traditional recipes? According to recent dessert trend reports, no-bake and gelatin-based treats have surged 220% in popularity as home cooks seek faster, lighter alternatives to classic fudge that often demands 30+ minutes of constant attention and lands at 200+ calories per piece.
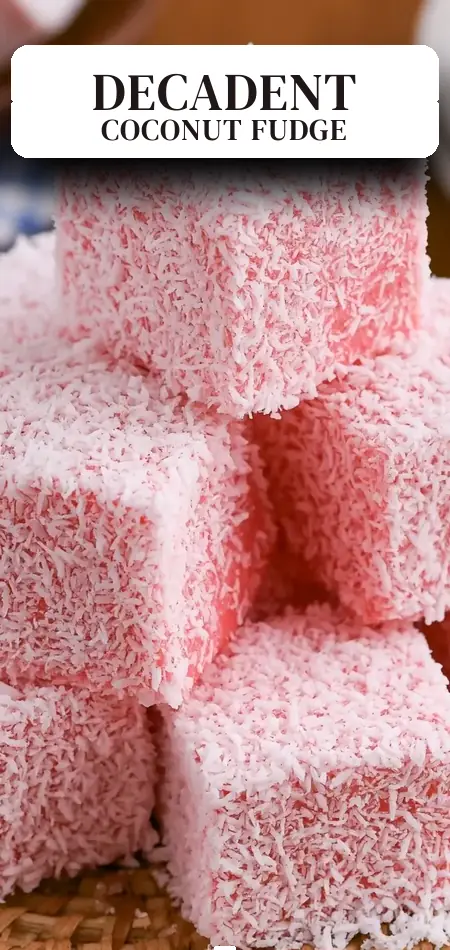
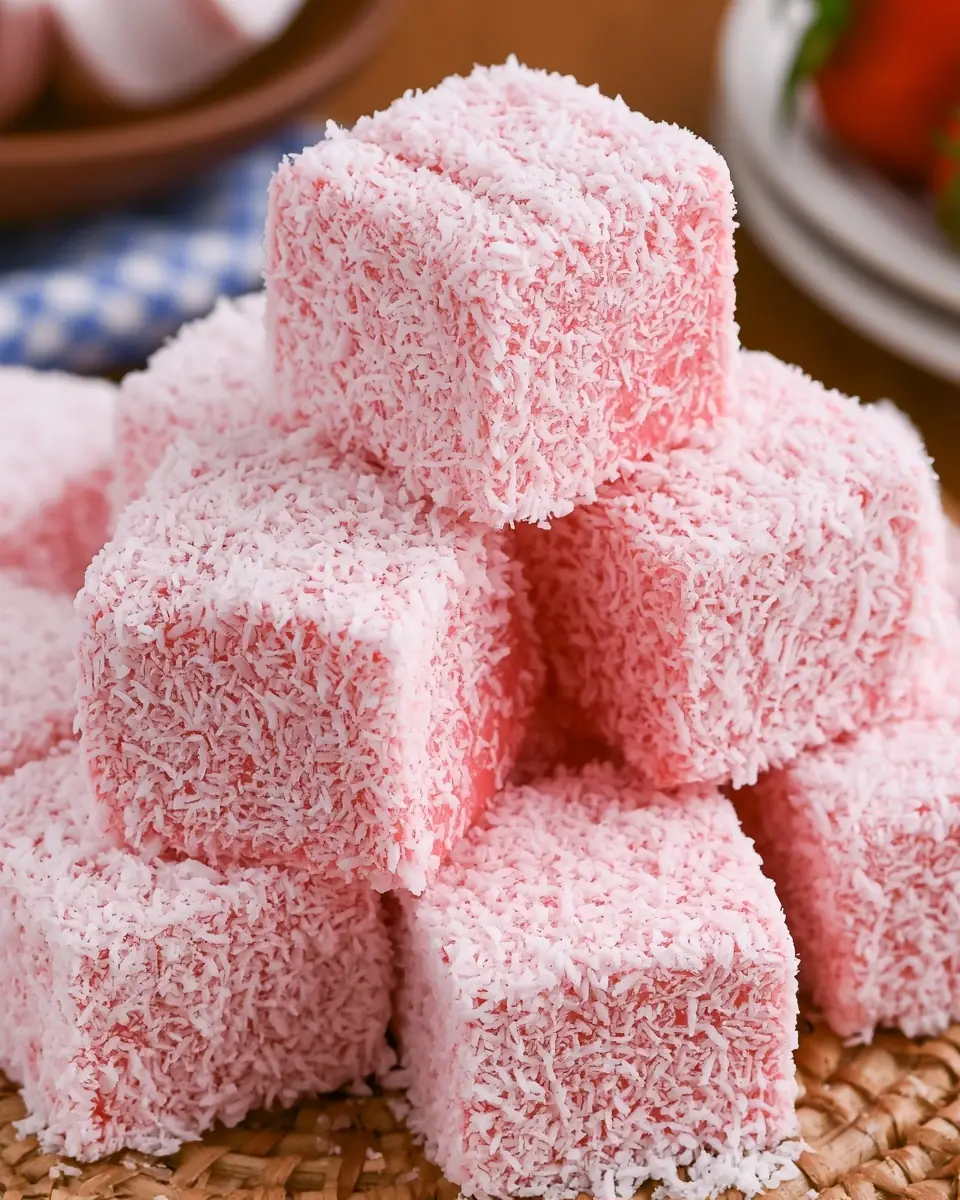
This homemade coconut fudge recipe delivers exactly that. Also known as strawberry coconut fudge squares or whipped gelatin coconut treats, it transforms simple strawberry gelatin, sugar, and boiling water into a creamy, voluminous base that sets into soft, bouncy squares before being generously coated in shredded coconut. At approximately 150 calories per serving, these homemade coconut fudge squares offer a refreshing, lower-calorie twist on fudge that feels indulgent yet surprisingly light.
Perfect for summer gatherings, holiday cookie trays, afternoon snacks, or gifting, this easy coconut fudge recipe brings vintage charm and modern convenience together in one colorful, tropical bite. Whether you’re a beginner baker or an experienced dessert lover, you’ll appreciate how effortlessly this recipe comes together while still delivering impressive results.
Ingredients List
The beauty of this homemade coconut fudge recipe lies in its minimal ingredient list. Each component serves a specific purpose in creating the signature creamy texture and balanced flavor.
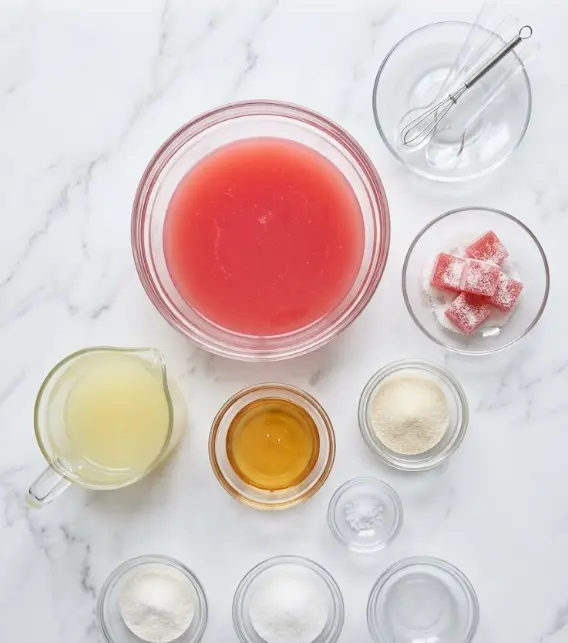
- 1 box (85g / 3 oz) strawberry-flavored gelatin (provides the bright color, fruity flavor, and setting power)
- 240 ml (1 cup) boiling water (activates and fully dissolves the gelatin for a smooth base)
- 200 g (1 cup) granulated sugar (sweetens the mixture and helps achieve the fluffy, creamy volume when whipped)
- 100 g (1 cup) shredded coconut (for coating—sweetened or unsweetened both work; toasting enhances nutty flavor)
Equipment Needed:
- Stand mixer or hand mixer with whisk attachment (essential for beating the mixture to double volume)
- 8×8-inch or 9×9-inch square mold or baking pan
- Light cooking spray or butter for greasing
- Sharp knife for cutting squares
Smart Substitutions and Variations:
- Change the gelatin flavor to lemon, lime, orange, or raspberry for different colored and flavored homemade coconut fudge variations. Coconut-flavored gelatin creates an even stronger tropical profile.
- Use monk fruit sweetener or allulose in place of granulated sugar for a lower-sugar or keto-friendly version (adjust quantity slightly as these sweeteners can behave differently when whipped).
- Toast the shredded coconut in a 325°F oven for 5–7 minutes for deeper flavor and golden color, or pulse it finer in a food processor for easier, more even coating.
- For a more pronounced coconut taste, add ½ teaspoon coconut extract to the whipped mixture.
- Make it vegan by substituting with agar-agar powder and adjusting the whipping and setting process (texture will be firmer).
These flexible options allow the coconut fudge recipe to adapt to various dietary preferences while maintaining its signature light and creamy character.
Timing
- Prep Time: 10 minutes
- Whipping Time: 10 minutes
- Chilling Time: 3 hours
- Total Time: 3 hours 20 minutes
This homemade coconut fudge recipe is remarkably efficient compared to traditional chocolate or caramel fudge, which often requires 20–45 minutes of active stovetop stirring and additional cooling time. The 10-minute active prep and whipping phase makes it accessible even on busy days, while the hands-off 3-hour refrigeration allows the gelatin to set into perfect, sliceable squares. The recipe yields 8 generous squares—ideal for small gatherings or portion-controlled snacking. Many testers report the final chilling can be reduced to 2 hours in a pinch, making this one of the faster “fudge-style” desserts available.
Step-by-Step Instructions
Step 1: Dissolve the Gelatin
Bring 240 ml of water to a rolling boil. In the bowl of your stand mixer (or a large heat-safe bowl if using a hand mixer), combine the strawberry gelatin powder with the boiling water. Stir gently until the gelatin is completely dissolved and the mixture is clear with a vibrant pink hue. This usually takes 1–2 minutes.
Pro Tip: Make sure the water is truly boiling to ensure full activation of the gelatin. Undissolved granules will create a grainy texture in your final homemade coconut fudge.
Step 2: Whip the Mixture to Creamy Perfection
Add the 200 g of granulated sugar to the dissolved gelatin mixture. Using a stand mixer fitted with the whisk attachment (or a hand mixer on high speed), beat the mixture for approximately 10 minutes. The volume should double or even triple, turning from a thin liquid into a thick, creamy, opaque foam with a consistency similar to marshmallow fluff or whipped cream.
Personalized Tip: The whipping step is what transforms this from simple jelly into luxurious coconut fudge. Watch for the color to lighten significantly and the mixture to hold soft peaks. If your kitchen is warm, place the bowl over ice periodically to help stabilize the foam.
Step 3: Prepare the Mold and Pour
Lightly grease an 8×8-inch square pan or silicone mold with cooking spray or a thin layer of butter. Pour the whipped gelatin mixture into the prepared mold, smoothing the top with a spatula for even thickness. Tap the pan gently on the counter to remove any large air bubbles.
Step 4: Chill Until Firm
Place the mold in the refrigerator for at least 3 hours, or until the homemade coconut fudge is completely set and firm to the touch. The longer it chills, the cleaner the cuts will be. Avoid the freezer, as it can create an uneven texture.
Step 5: Cut and Coat with Coconut
Once fully set, remove the fudge from the mold. If using a pan, run a knife around the edges and invert onto a cutting board. Cut into 8 equal squares (or smaller bite-sized pieces for parties). Place the 100 g shredded coconut in a shallow bowl or plate. Press each square into the coconut, coating all sides generously. Gently shake off excess.
Trick for Success: A light spray of cooking oil on your knife prevents sticking during cutting. For extra flavor, use toasted coconut—the subtle crunch and nutty aroma elevate the entire coconut fudge recipe.
Nutritional Information
Each square of this homemade coconut fudge (based on 8 servings) contains approximately:
- Calories: 150
- Total Fat: 3g (mostly from coconut)
- Saturated Fat: 2.5g
- Cholesterol: 0mg
- Sodium: 45mg
- Total Carbohydrates: 32g
- Dietary Fiber: 1g
- Total Sugars: 30g
- Protein: 1g
Compared to traditional chocolate fudge (often 220–280 calories per similar piece with higher fat content), this lighter gelatin-based version delivers significantly fewer calories while providing a fun burst of fruit flavor. The coconut coating adds healthy fats and a small amount of fiber. Gelatin itself contributes collagen benefits that support joint and skin health. Overall, two squares remain under 300 calories—making these homemade coconut fudge squares a smarter choice for those watching their intake without sacrificing dessert satisfaction.
Healthier Alternatives for the Recipe
This coconut fudge recipe adapts beautifully to healthier lifestyles while preserving its creamy appeal:
- Lower Sugar: Reduce sugar to 150g or replace half with a sugar substitute like allulose or monk fruit blend designed for baking and whipping.
- Sugar-Free Version: Use sugar-free strawberry gelatin and a zero-calorie sweetener. The whipping time may increase slightly to achieve proper volume.
- Boosted Nutrition: Stir in 1–2 tablespoons of collagen peptides during the whipping stage for extra protein (adding roughly 5g per serving).
- Natural Coloring and Flavor: Opt for naturally colored and flavored gelatin or add a teaspoon of beet powder and strawberry extract for a cleaner-ingredient version.
- Vegan Adaptation: Replace animal-based gelatin with agar-agar or a vegan gelatin alternative. Increase boiling water slightly and note the texture will be more firm than bouncy.
- Coconut Upgrade: Use unsweetened, finely shredded coconut and add a touch of coconut oil to the mixture for richer tropical notes with less added sugar.
These modifications make the homemade coconut fudge suitable for low-sugar, higher-protein, or plant-based diets without losing its signature light and fluffy character.
Serving Suggestions
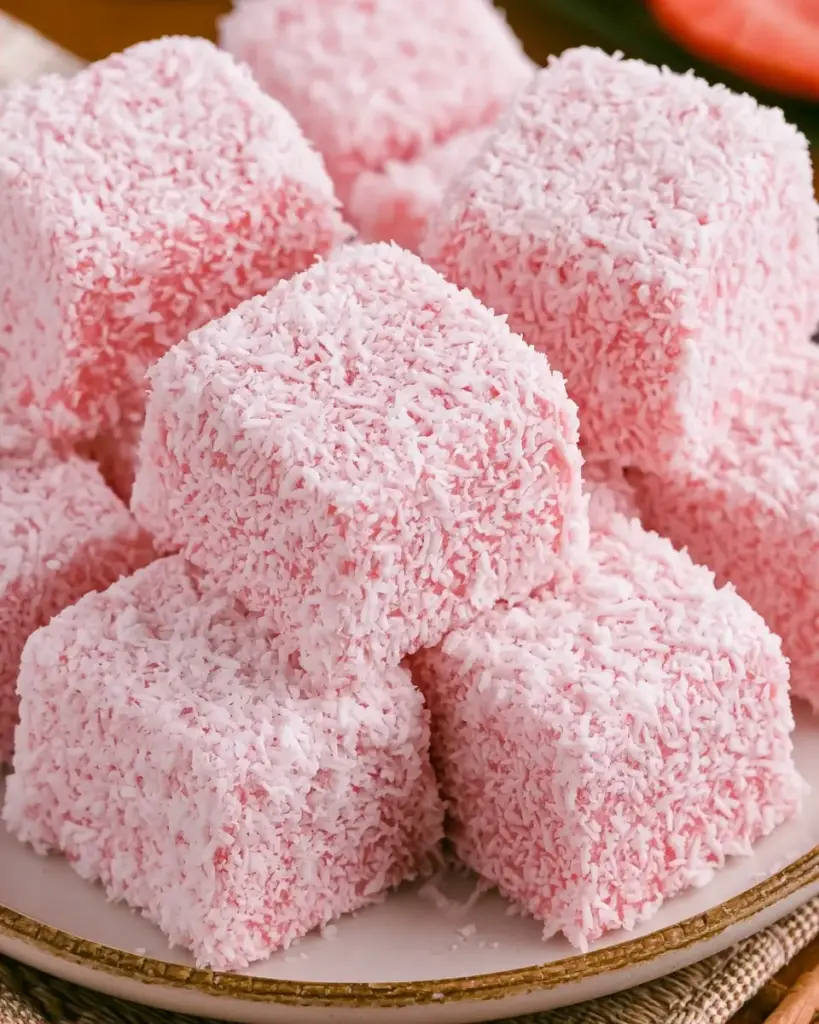
Serve these homemade coconut fudge squares chilled or at cool room temperature for the best texture. Their pretty pink interior contrasted with the white coconut coating makes them visually striking on dessert tables.
Creative ideas include:
- Pairing with hot tea or iced coffee to balance the sweetness
- Arranging on a platter with fresh strawberries and dark chocolate for an elegant dessert board
- Packaging in clear gift bags tied with ribbon for teacher gifts, party favors, or holiday presents
- Serving alongside vanilla ice cream for a playful sundae twist
- Adding to lunchboxes as a fun, colorful treat that holds up well
Personal Tip: These squares taste even better the next day as the coconut coating softens slightly and flavors meld. They’re especially delightful at summer potlucks where heavier desserts feel too rich.
Common Mistakes to Avoid
Even simple recipes have pitfalls. Here are the top mistakes to avoid when making homemade coconut fudge:
- Insufficient Whipping Time: Beating for less than 8–10 minutes results in dense, flat squares instead of light, creamy ones. Set a timer and watch for significant volume increase.
- Water Not Hot Enough: Lukewarm water fails to dissolve the gelatin properly, leading to grainy texture. Always use freshly boiled water.
- Adding Sugar Too Early or Late: Incorporate sugar immediately after dissolving gelatin for best foaming results.
- Skipping the Grease on the Mold: The mixture will stick, making clean removal difficult. A light coating of oil or butter is essential.
- Cutting While Warm: Slicing before full chilling creates messy, sticky edges. Patience during the 3-hour chill pays off.
- Using Wet Hands When Coating: Damp hands cause the coconut to clump. Keep hands dry or use gloves for neat application.
Following these insights from multiple test batches ensures perfect, professional-looking coconut fudge every time.
Storing Tips for the Recipe
Homemade coconut fudge stores beautifully with proper care:
- Refrigerator: Keep in an airtight container for up to 10 days. The gelatin base stays fresh and the coconut coating maintains texture when chilled.
- Room Temperature: Safe for up to 4–6 hours in cool conditions. Avoid warm environments as the squares can become sticky.
- Freezer: Freeze cut and coated squares on a tray before transferring to a freezer bag for up to 2 months. Thaw overnight in the refrigerator.
- Make-Ahead: Prepare the whipped mixture and chill up to 2 days before cutting and coating for parties.
Layer squares between parchment paper to prevent sticking. A light additional dusting of coconut before storing helps absorb any moisture.
Conclusion
This easy homemade coconut fudge recipe creates light, creamy strawberry gelatin squares whipped to fluffy perfection and coated in sweet shredded coconut. At just 150 calories per piece and ready with minimal effort, it offers a refreshing, no-cook alternative to heavy traditional fudge. Perfect for parties, snacks, or gifting, these tropical-inspired treats deliver big flavor with little work.
Ready to try something delightfully different? Make this homemade coconut fudge recipe this week and share your results, flavor variations, or photos in the comments below. Subscribe for more easy dessert recipes, no-bake treats, and creative gelatin ideas delivered straight to your inbox.
FAQs
Is this really fudge or more like jelly?
While traditionally fudge is chocolate or caramel-based, this homemade coconut fudge is a light, whipped gelatin version—similar to old-fashioned marshmallow fudge or Turkish delight. The creamy texture after whipping justifies the “fudge” name in many vintage recipe collections.
Can I use sugar-free gelatin for this coconut fudge recipe?
Yes. Sugar-free strawberry gelatin works well, though the mixture may take slightly longer to reach full volume during whipping. The final texture remains excellent.
Why does the mixture need to be beaten for 10 minutes?
The extended whipping incorporates air, doubles the volume, and creates the signature creamy, fluffy texture that sets this apart from plain gelatin desserts.
How long do the homemade coconut fudge squares last?
Up to 10 days in the refrigerator in an airtight container. They’re best enjoyed within the first 5–6 days while the coconut coating stays fresh.
Can I change the flavor of the gelatin?
Absolutely. Lemon, lime, orange, or cherry gelatin all produce delicious variations. Coconut extract pairs especially well with any fruit flavor.
Do I need to toast the shredded coconut?
Toasting is optional but highly recommended. It adds nutty depth and prevents the coating from feeling too sweet. Raw coconut works in a pinch.
Why did my homemade coconut fudge turn out dense instead of creamy?
Most likely the mixture wasn’t whipped long enough or the gelatin wasn’t fully dissolved. Follow the 10-minute whipping guideline and use boiling water for best results.
Homemade Coconut Fudge Recipe
Ingredients
Equipment
Method
- Dissolve the gelatin in the boiling water.
- Beat in a mixer for about 10 minutes or until doubled in volume and very creamy.
- Pour into a lightly greased mold.
- Refrigerate for approximately 3 hours.
- Cut into squares and coat with shredded coconut.
- Serve and enjoy!