Creating lace wrapped candles is one of my favorite candle decorating techniques. Over the years, I’ve experimented with different fabrics, designs, and embellishments, and lace has always stood out for its timeless beauty and versatility. Whether you’re preparing for a wedding, hosting a dinner party, or simply adding a soft, romantic touch to your home décor, lace wrapped candles are an affordable yet elegant option.
I’ve worked with all kinds of lace — from delicate vintage trims to bold, modern patterns — and each type transforms an ordinary candle into a stunning centerpiece. In this guide, I’ll walk you through my best DIY tips to create lace wrapped candles that not only look exquisite but also last longer and stay safe for use.
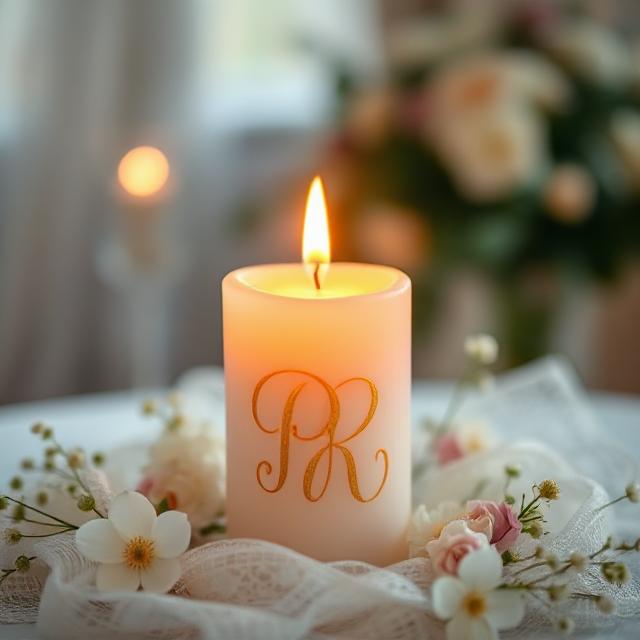
Why Lace Wrapped Candles Are Perfect for Home Décor and Gifts
Lace wrapped candles bring a unique blend of elegance and warmth to any setting. As someone who has decorated countless tables and gift baskets, I can say with confidence that they stand out without overshadowing other décor pieces. The texture of lace catches light beautifully, adding depth and character to the candle’s glow.
When you’re planning a special event like a wedding, baby shower, or even an intimate dinner, lace wrapped candles create a sophisticated ambiance. I’ve also found them to be perfect for seasonal décor — white lace for winter holidays, pastel lace for spring gatherings, or rustic jute-lace combinations for autumn.
As gifts, they’re a hit because they look handmade and personal. You can tailor the lace color, design, and embellishments to match the recipient’s style, which makes the gift feel thoughtful. People appreciate that extra effort, and it’s one reason why I include lace wrapped candles in many of my gift sets.
From a budget perspective, lace wrapping is cost-effective. A small piece of lace can go a long way, and you can repurpose leftover trims from sewing projects or even thrifted fabrics. This means you can create high-end looking candles without spending a fortune — a trick I’ve used for both personal projects and commissioned work.
Essential Tools and Materials for Lace Wrapped Candles
One thing I’ve learned from years of candle crafting is that preparation is key. Having all your tools and materials ready before you start makes the process smoother and reduces the chances of mistakes. Here’s what I always keep on hand for lace wrapped candle projects:
Materials:
-
Pillar or jar candles (unscented or scented, depending on your preference)
-
Lace trim or fabric (cotton lace, crocheted lace, or synthetic lace)
-
Decorative ribbons or twine (optional)
-
Fabric glue or double-sided adhesive tape
-
Heat-resistant embellishments like pearls or rhinestones (optional)
Tools:
-
Sharp scissors for clean lace cuts
-
Measuring tape for accurate sizing
-
Small paintbrush (for applying glue evenly)
-
Tweezers for precise placement of embellishments
-
A clean, flat work surface
I prefer to work with cotton lace for most projects because it wraps smoothly around the candle and adheres well to glue. Synthetic lace can also be beautiful, especially if it has metallic threads that shimmer under candlelight.
When it comes to adhesives, I always recommend fabric glue over hot glue for lace. Fabric glue creates a smoother bond without leaving bulky spots, and it dries clear, keeping the design clean and professional.
If you’re aiming for a more temporary design — for example, changing candle wraps seasonally — you can use double-sided adhesive tape. This allows you to remove and replace the lace without damaging the candle’s surface.
Choosing the Right Type of Lace for Your Candles
Not all lace is created equal, and choosing the right type can make or break your design. Over the years, I’ve developed a few go-to rules that help me select the perfect lace for each project.
For tall pillar candles, I prefer lace with a continuous, vertical pattern. This creates a seamless look that flows with the candle’s shape. On shorter candles or jar candles, wide lace with intricate floral patterns works beautifully because it shows off more detail in a smaller space.
The color of the lace also plays a big role. White or ivory lace is classic and versatile, but don’t be afraid to experiment with bolder shades like burgundy, navy, or gold for festive occasions. I’ve even dyed lace to match specific color themes, which is a great trick when you can’t find the perfect shade in stores.
Texture is another factor. Soft lace drapes smoothly and hugs the candle’s surface, while stiff lace may require more effort to secure but holds its shape well for structured designs. For a vintage look, I sometimes use antique lace sourced from old garments or linens — it adds a unique charm you simply can’t get from store-bought materials.
When buying lace, I recommend getting a little more than you think you’ll need. This gives you room to experiment and account for any mistakes in cutting or measuring. Lace is relatively inexpensive, so having extra on hand is always a good idea.
Preparing Your Candle Surface for Wrapping
The way you prepare your candle before applying lace will determine how neat and durable the final design looks. I never rush this step because a clean, smooth surface makes the lace adhere better and prevents peeling over time.
If the candle has dust or residue, I start by wiping it gently with a soft, lint-free cloth. For stubborn marks, I dampen the cloth slightly with warm water, but I avoid soaking the candle — too much moisture can affect adhesion.
When I’m working with jar candles, I always remove any labels or stickers first. Sticky residue can be cleaned off with a small amount of rubbing alcohol on a cotton pad. This not only helps the lace bond better but also gives a polished, professional finish.
For wax candles without containers, I sometimes lightly buff the surface with a dry, soft sponge to smooth out any imperfections. This creates an even base for the lace and ensures a snug fit around the candle. Skipping this step can result in uneven edges or gaps that distract from the overall beauty of the design.
Step-by-Step Guide: Wrapping Candles with Lace
Over time, I’ve refined my method for wrapping candles with lace to make it both simple and effective. Here’s the process I use every time:
First, I measure the circumference and height of the candle. I then cut the lace to size, adding a little extra length so it overlaps slightly at the back. This ensures full coverage without leaving a gap.
Next, I apply a thin, even layer of fabric glue along the starting edge of the lace. I press this glued edge onto the candle, making sure it’s perfectly straight before continuing. The first point of contact sets the tone for the entire wrap, so I take my time with it.
Once the starting edge is secured, I gently pull the lace around the candle, smoothing it as I go. I apply small dabs of glue in sections rather than coating the entire lace strip at once. This gives me better control and prevents the glue from seeping through the delicate fabric.
Finally, I secure the overlapping edge at the back with another thin line of glue, pressing it down firmly. I let the candle rest undisturbed until the glue is completely dry. If I’m in a rush, I still avoid moving it too much — patience here prevents misalignment.
Creative Design Ideas for Lace Wrapped Candles
Lace wrapping offers endless opportunities for creativity, and I’ve experimented with designs ranging from minimalist to extravagant.
For a romantic look, I use white lace paired with satin ribbon in pastel colors. This style works beautifully for weddings or anniversaries. For a rustic farmhouse vibe, I combine burlap with lace, securing it with twine for a charming contrast of textures.
Seasonal designs are another favorite of mine. At Christmas, I like to use red lace or white lace with tiny gold accents. In the spring, floral-patterned lace in soft colors feels fresh and inviting. For autumn, I might choose lace in earthy tones like beige or deep orange, paired with small faux leaves or acorns as embellishments.
Layering is a trick I often use. You can wrap a candle in a solid-colored fabric first, then overlay it with lace. This makes the lace pattern stand out more, especially when the fabric underneath is in a contrasting shade.
Another idea is to wrap only the center portion of the candle, leaving exposed wax at the top and bottom. This creates a band-like effect that’s sleek and modern. It’s also a good option if you want to showcase a particularly intricate lace design without overwhelming the candle.
Adding Embellishments for a Unique Touch
Lace alone can be stunning, but sometimes I like to enhance the design with a few extra details. Small embellishments can take a lace wrapped candle from lovely to show-stopping.
I often add tiny flat-backed pearls or rhinestones to the lace pattern. These catch the light beautifully and add a subtle sparkle. When attaching embellishments, I use a precision applicator to avoid excess glue that might mar the lace.
For a softer look, I’ll tie a ribbon or bow around the candle, either at the top edge of the lace or just below it. Satin, velvet, or organza ribbons work well, depending on the occasion and style.
Another option is to incorporate charms or small decorative pendants. For example, a tiny heart charm for a Valentine’s Day candle or a snowflake charm for a winter centerpiece adds a thematic touch.
The key with embellishments is balance. Too many can overwhelm the lace, while just a few well-placed accents can make the design feel complete. I always step back and view the candle from a distance to see if the proportions feel right before finalizing the decoration.
Tips for Securing Lace So It Lasts Longer
One of the most common issues I hear from beginners is that the lace eventually loosens or starts peeling away from the candle. Over the years, I’ve developed a few strategies to make lace-wrapped designs more durable.
First, I make sure the adhesive is applied evenly but sparingly. Too much glue can seep through the lace and create stiff, unattractive spots, while too little won’t hold the lace securely. I use a fine-tip applicator or a small brush to control the amount.
Second, I always let the glue cure completely before handling the candle. Even if it feels dry to the touch, it may not be fully set, and moving it too soon can cause the lace to shift. I typically leave it for at least 24 hours in a dust-free area.
Lastly, for designs that need to withstand frequent handling — such as candles in a retail setting or part of an event display — I sometimes seal the lace with a light layer of clear, non-flammable fabric sealant. This helps protect it from fraying and adds a bit of resistance to wear and tear.
Safety Considerations When Using Lace on Candles
As beautiful as lace wrapped candles are, safety always comes first. Lace is a flammable material, and I never place it too close to the open flame of a burning candle.
For pillar candles, I keep the lace positioned well below the wick area, leaving enough plain wax at the top so the lace doesn’t come into contact with heat. For jar candles, this is less of a concern since the flame is contained, but I still avoid placing embellishments near the rim.
I also recommend using lace wrapped candles primarily as decorative pieces rather than for long burns. If they are going to be lit, I suggest placing them in a glass hurricane holder or similar protective container. This way, you can enjoy the glow while keeping the lace safe.
It’s also worth noting that some adhesives can give off fumes when exposed to high heat. I always use non-toxic, heat-safe glues specifically designed for crafts, ensuring both safety and comfort.
Color Coordination and Styling Ideas for Different Occasions
One of the joys of working with lace is its adaptability to any color scheme. I often match lace wrapped candles to seasonal palettes or event themes for maximum visual impact.
For weddings, ivory lace over white candles is a timeless choice, often accented with soft blush or pastel ribbons. At Christmas, I might combine deep red candles with white lace and a touch of gold ribbon for a warm, festive look.
Summer events call for brighter, more playful designs — think turquoise lace over yellow candles or coral lace paired with crisp white. In autumn, I love using lace in burnt orange, mustard yellow, or chocolate brown to complement natural seasonal tones.
Styling doesn’t stop with color. Placement matters too. A group of three lace wrapped candles of varying heights creates a beautiful focal point for a table. Mixing lace-wrapped designs with plain candles adds texture and prevents the display from looking too uniform.
Troubleshooting Common Mistakes in Lace Wrapping
Even with the best intentions, small mistakes can happen — and I’ve certainly made my share over the years.
One common issue is crooked lace alignment. This often happens when the first glued edge isn’t perfectly straight. To fix it, I carefully peel the lace back before the glue fully sets and reposition it. Using a ruler or guide can also help keep everything even.
Another problem is glue stains showing through the lace. This usually means too much glue was applied or it was spread unevenly. My fix is to apply glue in tiny dots rather than full lines when working with very fine lace.
Sometimes the lace can fray at the cut edges. To prevent this, I lightly dab the ends with clear fabric sealant or even a bit of transparent nail polish — just enough to keep the threads from unraveling.
Eco-Friendly Alternatives for Lace and Candle Materials
In recent years, I’ve shifted toward more eco-friendly candle-making practices, and lace wrapping is no exception.
Organic cotton lace is a wonderful alternative to synthetic fabrics. It’s biodegradable, breathable, and often softer to work with. You can also upcycle lace from thrifted garments, tablecloths, or curtains, giving them new life instead of letting them go to waste.
When it comes to candles themselves, I prefer soy wax or beeswax, both of which are renewable and burn cleaner than paraffin. Combining sustainable candles with repurposed lace creates a product that’s beautiful and kind to the environment.
Budget-Friendly DIY Hacks for Lace Wrapped Candles
You don’t need to spend much to create gorgeous lace wrapped candles. One of my favorite tricks is to buy plain candles in bulk and dress them up with inexpensive lace remnants. Fabric stores often sell lace scraps for a fraction of the price of full rolls.
Another tip is to repurpose old candles by giving them a lace makeover. If the candle’s surface looks worn, a fresh wrap of lace instantly makes it look new again.
You can also combine lace with other low-cost materials like jute, baker’s twine, or scrap ribbon to create layered designs that look high-end without the expense.
Inspiration Gallery: Styles from Rustic to Elegant
Over time, I’ve created lace wrapped candles in every style imaginable. Rustic designs often feature burlap and lace combinations with natural twine ties, perfect for farmhouse-style homes.
Elegant styles lean toward satin ribbons, pearls, and delicate white lace — ideal for weddings or formal dinners. Bohemian-inspired designs might include colorful lace, feathers, and beads for a free-spirited, eclectic look.
The possibilities are endless, and experimenting with styles is half the fun. I keep a photo collection of my favorite creations for future inspiration.
How to Package Lace Wrapped Candles for Gifting
Presentation matters when gifting lace wrapped candles. I often use clear cellophane bags tied with ribbon so the lace design remains visible. For a more eco-friendly approach, I wrap them in recycled tissue paper and place them in kraft gift boxes.
Adding a small tag with the recipient’s name or a short message makes the gift even more personal. If the candle has a specific scent, I sometimes include a little card describing it — it’s a small touch that adds value.
Maintaining and Cleaning Lace Wrapped Candles
While lace wrapped candles are relatively low-maintenance, a little care helps them look beautiful longer. I store them away from direct sunlight to prevent fading and dust them gently with a soft brush or cloth.
If the lace becomes loose over time, a tiny dab of fabric glue at the seam usually does the trick. For jar candles, the lace can be removed, washed gently, and reapplied if necessary.
Conclusion and Final Tips
Lace wrapped candles are one of the most versatile and charming DIY projects I’ve worked on. With the right preparation, materials, and attention to detail, you can create pieces that look like they came from a boutique store — all from the comfort of your own workspace.
My best advice is to experiment fearlessly. Try different lace patterns, mix in other materials, and adapt the designs for different seasons and occasions. Over time, you’ll develop your own signature style, and that’s when candle decorating becomes truly rewarding.
Hi, I’m Potatorich—a passionate candle enthusiast and wedding decorator who believes in the power of light to transform spaces. From sustainable candle choices to elegant décor ideas, I share my knowledge and experience to help couples create unforgettable atmospheres for their special day.